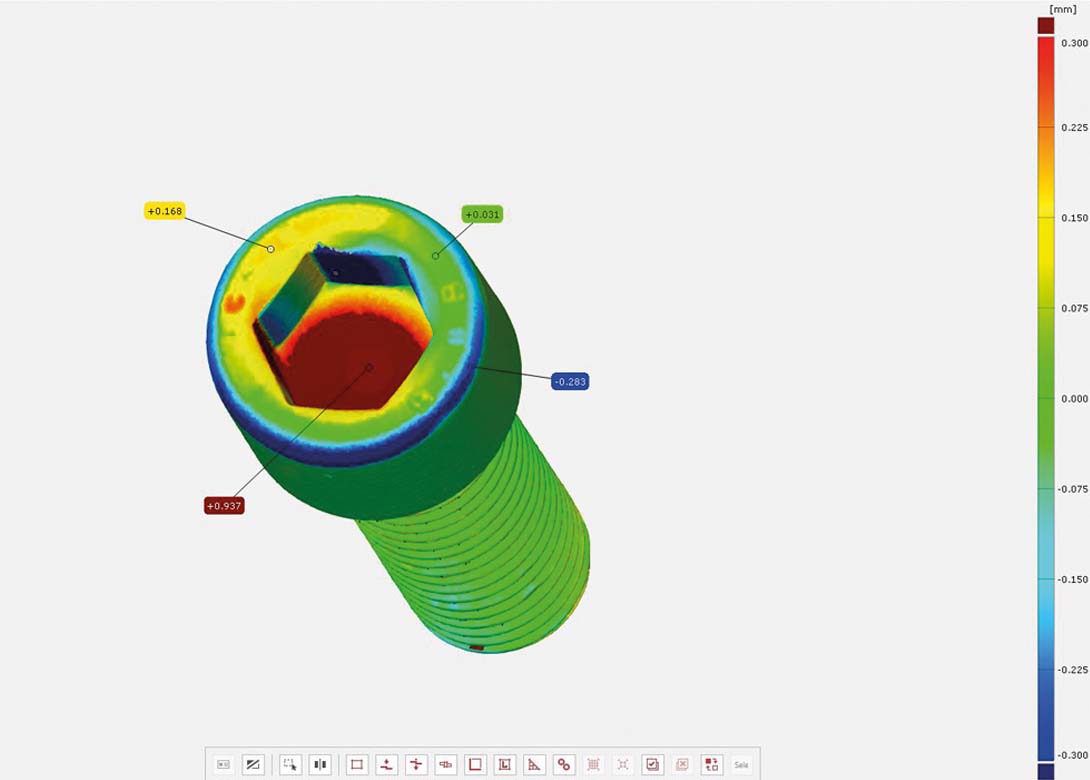
DÖRKEN and Vision Center have worked in partnership to create a contactless, precise and digital measuring process that can record different component surfaces – enabling optimal calculation of the amount of coating required for corrosion protection.
Sustainability is more important today than ever, which is why the corrosion experts at DÖRKEN decided to focus on the most precise use of paint in the surface coating of parts and components to deliver corrosion protection. To do this, DÖRKEN decided to work with Vision Center GmbH, based in Lüdenscheid, Germany, and use state of the art 3D measuring technology and digital image processing to measure parts and components down to the micrometre (µm).
A new approach to technology
A structured light projection process is used to accurately record the surface of the component. Although this technology is not wholly new, it is only in recent years that it has caught the interest of industry – as the capabilities of modern PC systems enable the relatively swift digitalisation of components. But how does the scanning process work exactly?
“A projection unit projects various patterns onto the part that is to be digitalised, with this then recorded by a camera system,” explains Dr Ing Sven Buhl, managing director at Vision Center GmbH. “The calibrated arrangement of projector and camera system is combined with the triangulation principle to calculate the distance information of the object that is to be scanned. This means that complete 3D models can be calculated using different angles to the object.”
“We wanted to use screws for the first attempts at measurement,” says Christos Tselebidis, vice-president industrial coatings at DÖRKEN. “However, it is very interesting for us to note that this process can be used to record and digitalise components ranging from just a few centimetres in size to around 300mm – wishbones, wheel bearings, large pins – there would be no limits.”
The Vision Center can even use the laser scanning process to digitalise components of up to around 5m. “We have found a solution to record even very small details, such as a fine thread, although this brings us to the boundaries of resolution for this system,” mentions Sven Buhl. “In this case the surface of the component could be recorded through a cylinder to keep deviations from the actual surface to a minimum.”
Another advantage of the measuring technology is that it’s a contactless optical procedure, which means that no reference marks need to be applied to the object. The digitalisation of the component can also be undertaken relatively quickly, enabling surfaces and volumes to be calculated simply using modern software tools.
“The joint experiments were highly relevant for us, as the measurement technology enables us to make a precise calculation of coating quantities and consequently make our coaters even more capable and professional,” comments Christos Tselebidis. “A further major advantage is the fact that the component scans can be conducted by the customer on-site using handheld laser scanners. This means we can give a faster estimation of required coating quantities and tanks, for example.”
www.vision-center.net www.doerken.com/global/en/home
Biog
Will joined Fastener + Fixing Magazine in 2007 and over the last 15 years has experienced every facet of the fastener sector - interviewing key figures within the industry and visiting leading companies and exhibitions around the globe.
Will manages the content strategy across all platforms and is the guardian for the high editorial standards that the Magazine is renowned.


